All rotis are not created equal, I know, but for most of my life I believed they should be. I’m looking at you – the aunty I almost never see who came over one day while I was cooking with my mom and commented I won’t find a husband if my rotis aren’t round.
“Ja, aunty,” I said as I hung my head.
As if I didn’t have enough going on in my teen years figuring out how to thin out my eyebrows, now I had to worry about finding a man who was okay with pear-shaped rotis.
Luckily, my husband doesn’t eat with his eyes first. Or maybe it was the fact that he fell in love with me in high school, when sharing my peanut butter and jam sandwich with him was enough to make him swoon.
Of course, that was a few years back, and I’ve had to adapt. At some point I had to return to my mom’s kitchen to learn how to make perfectly round rotis.
Now I’m a pro. Me and my rolling pin – name a better duo, I’ll wait.
Here’s a step-by-step guide to making perfectly round rotis that’ll impress all those snickering aunties:
Make the dough
Rotis can seem like a pretty daunting thing to attempt, but the actual dough-making process is fairly simple, with minimal ingredients.
In a bowl, sift 2 cups of flour, ½ tsp salt and ½ tsp sugar together. Boil 1¼ cup of a half water-half milk mixture and combine with 30g of melted butter. Add your wet ingredients to your dry ingredients and stir with the back of a wooden spoon, as your dough will be piping hot from your wet ingredients.
Tip: Gradually add the wet mixture to the dry until you get a dough-like consistency – you don’t want your mixture to be too wet, so you may not end up using all of your water-milk mixture.
Knead your dough for a few minutes before covering it with a damp tea towel. Set it aside to cool and rest.
Create your dough balls
Once your dough’s cooled down, roll it out on a floured surface like you would a Swiss roll – think one massive rectangular block. Dot it with butter, before rolling it into one long log, again, much like you would a Swiss roll.
Portion and cut your dough into 8–10 pieces and close off either end to create a round dough ball – a neat ball of dough is the first of many key tips to rolling a perfectly round roti.
Cover your dough balls with your damp tea towel and allow it to rest once more.
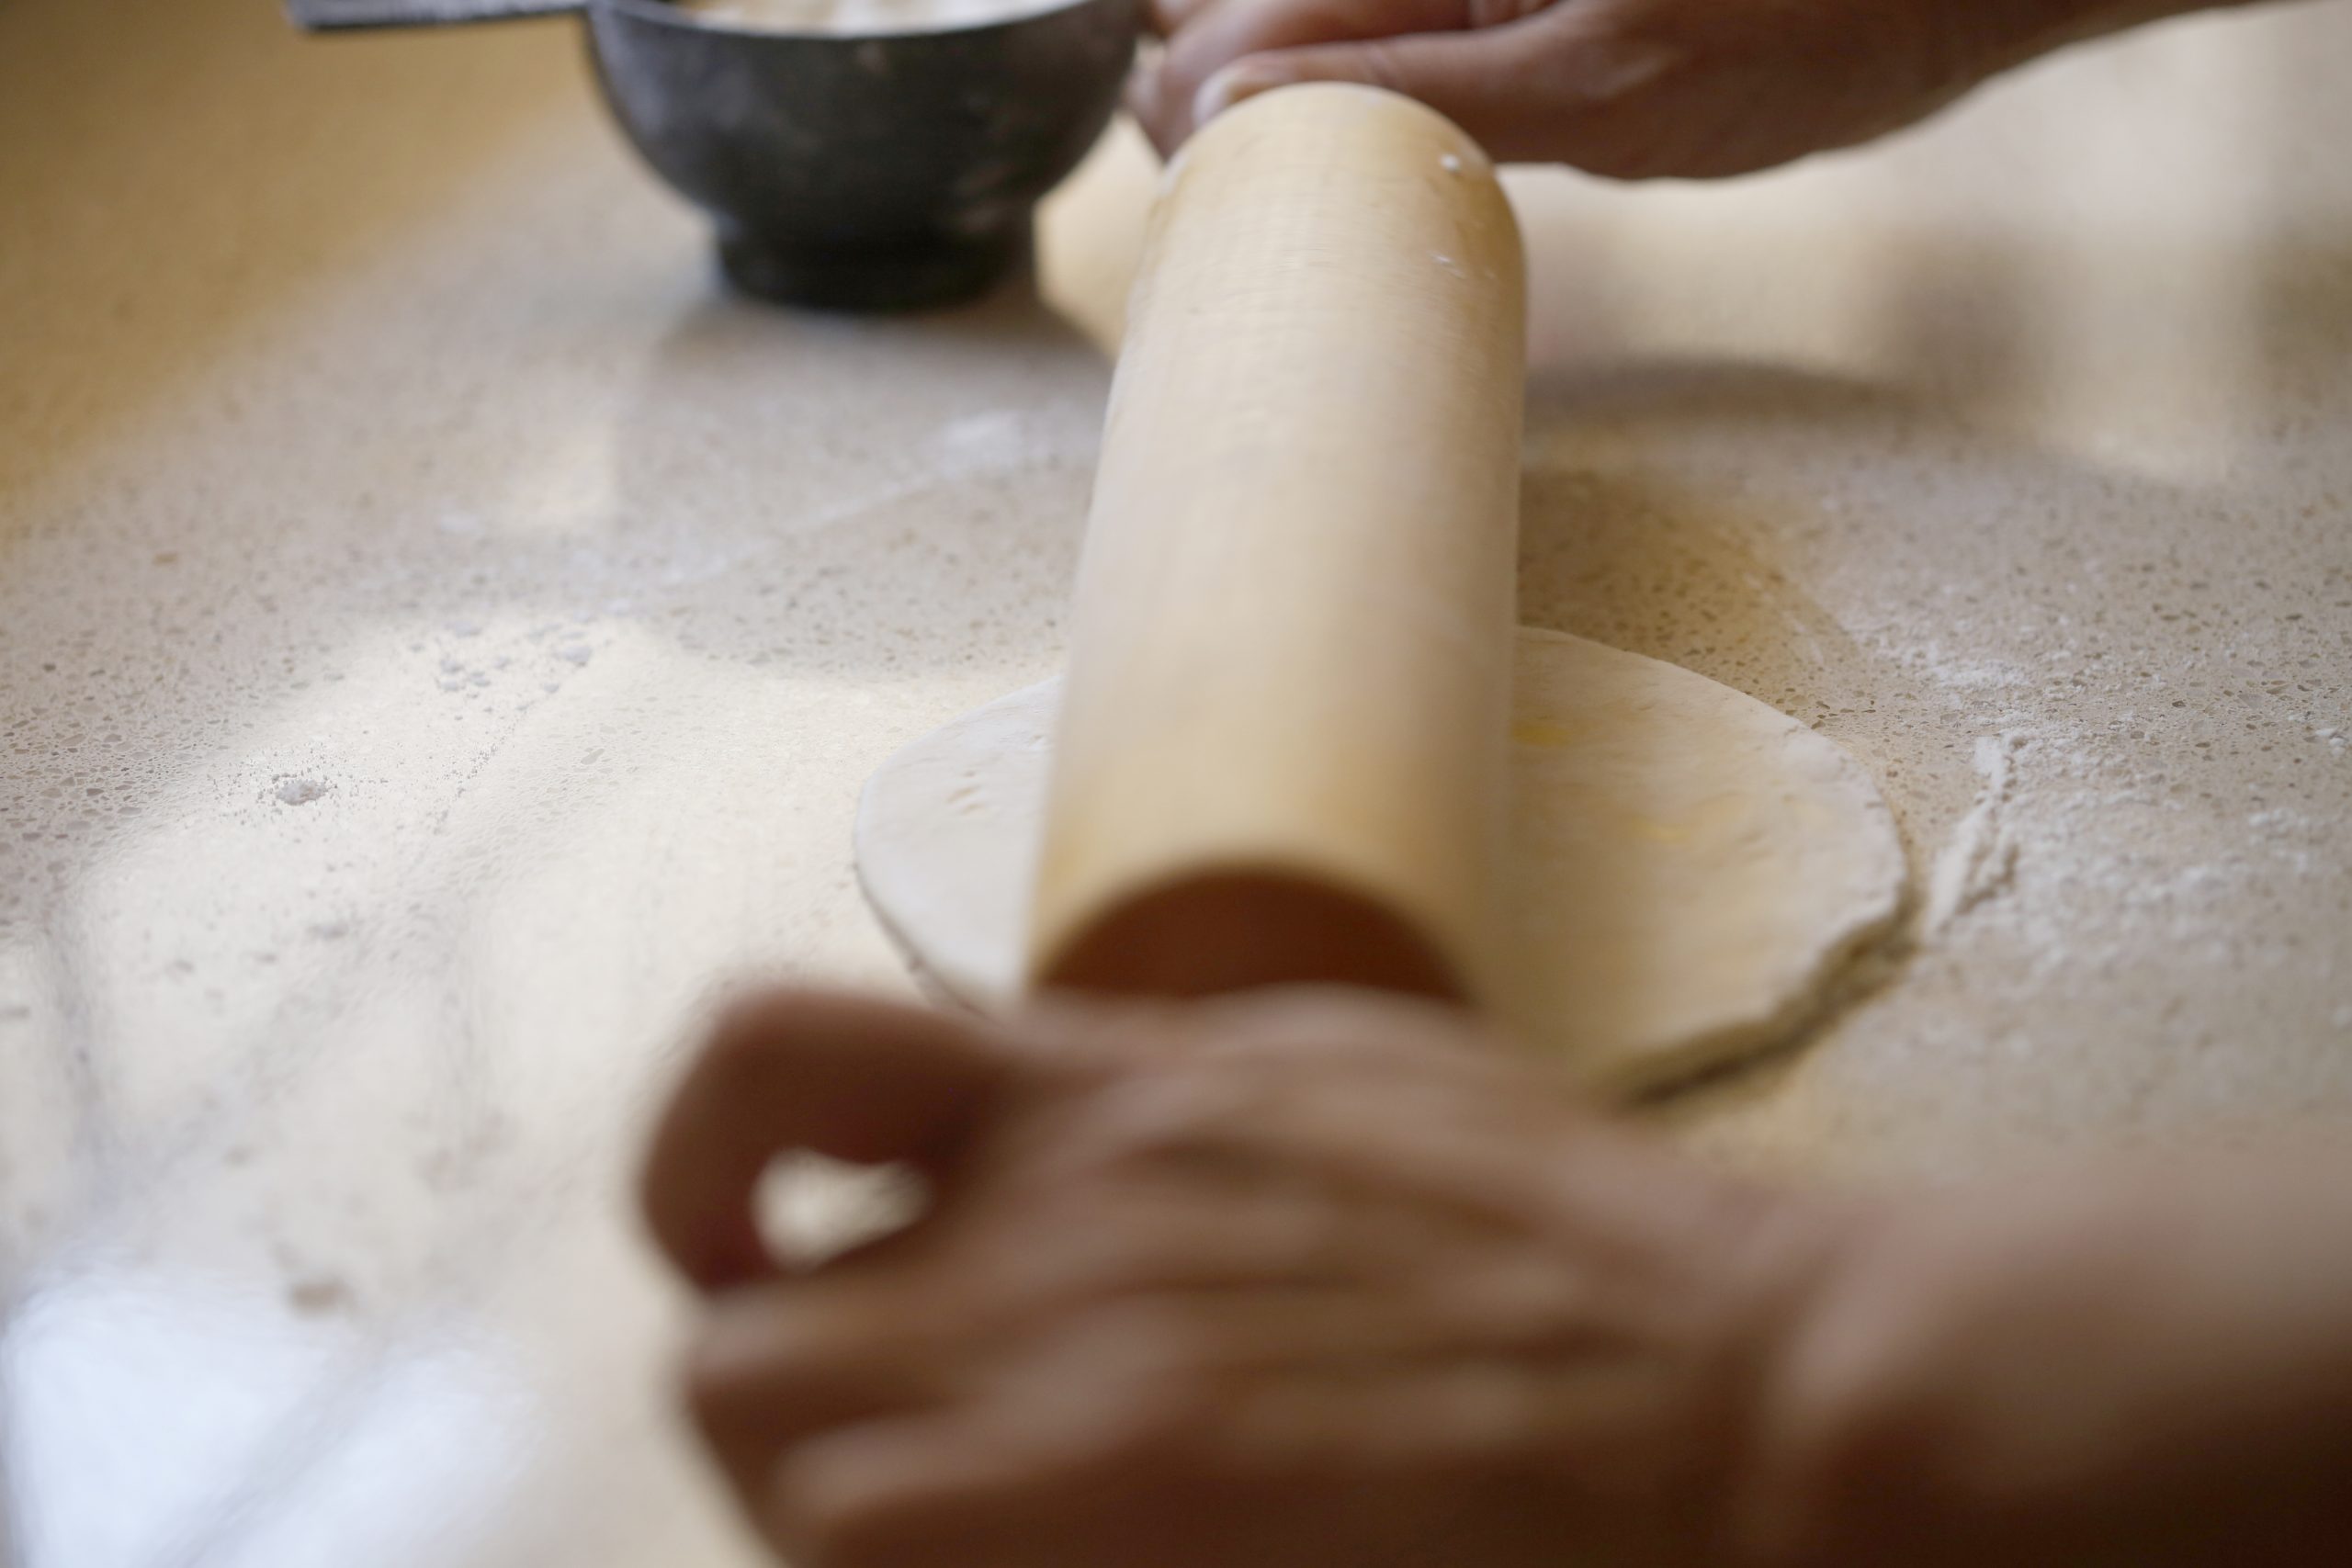
Rolling your rotis
Things are about to get tricky. A few key points before we begin:
- A rotating rolling pin is better than a fixed one when rolling out your rotis.
- Don’t forget to flour your surface before you start rolling.
- You want to apply gentle pressure throughout the rolling process.
Flour your surface underneath your ball of dough, as well as your rolling pin.
Press your roti gently with the palm of your hand so you begin with a slight disc instead of a ball.
Start rolling your roti by applying gentle pressure so as to move the dough out from the centre in one direction. You’ll find the dough is quite elastic, so the gentle pressure allows it to move in a circular motion, before bouncing back. Rotate your roti – you don’t want to do a full 90-degree rotation as that’s when you get perfectly square rotis – but instead shift it clockwise ever so slightly, while continuing the rolling process until you get your round shape.

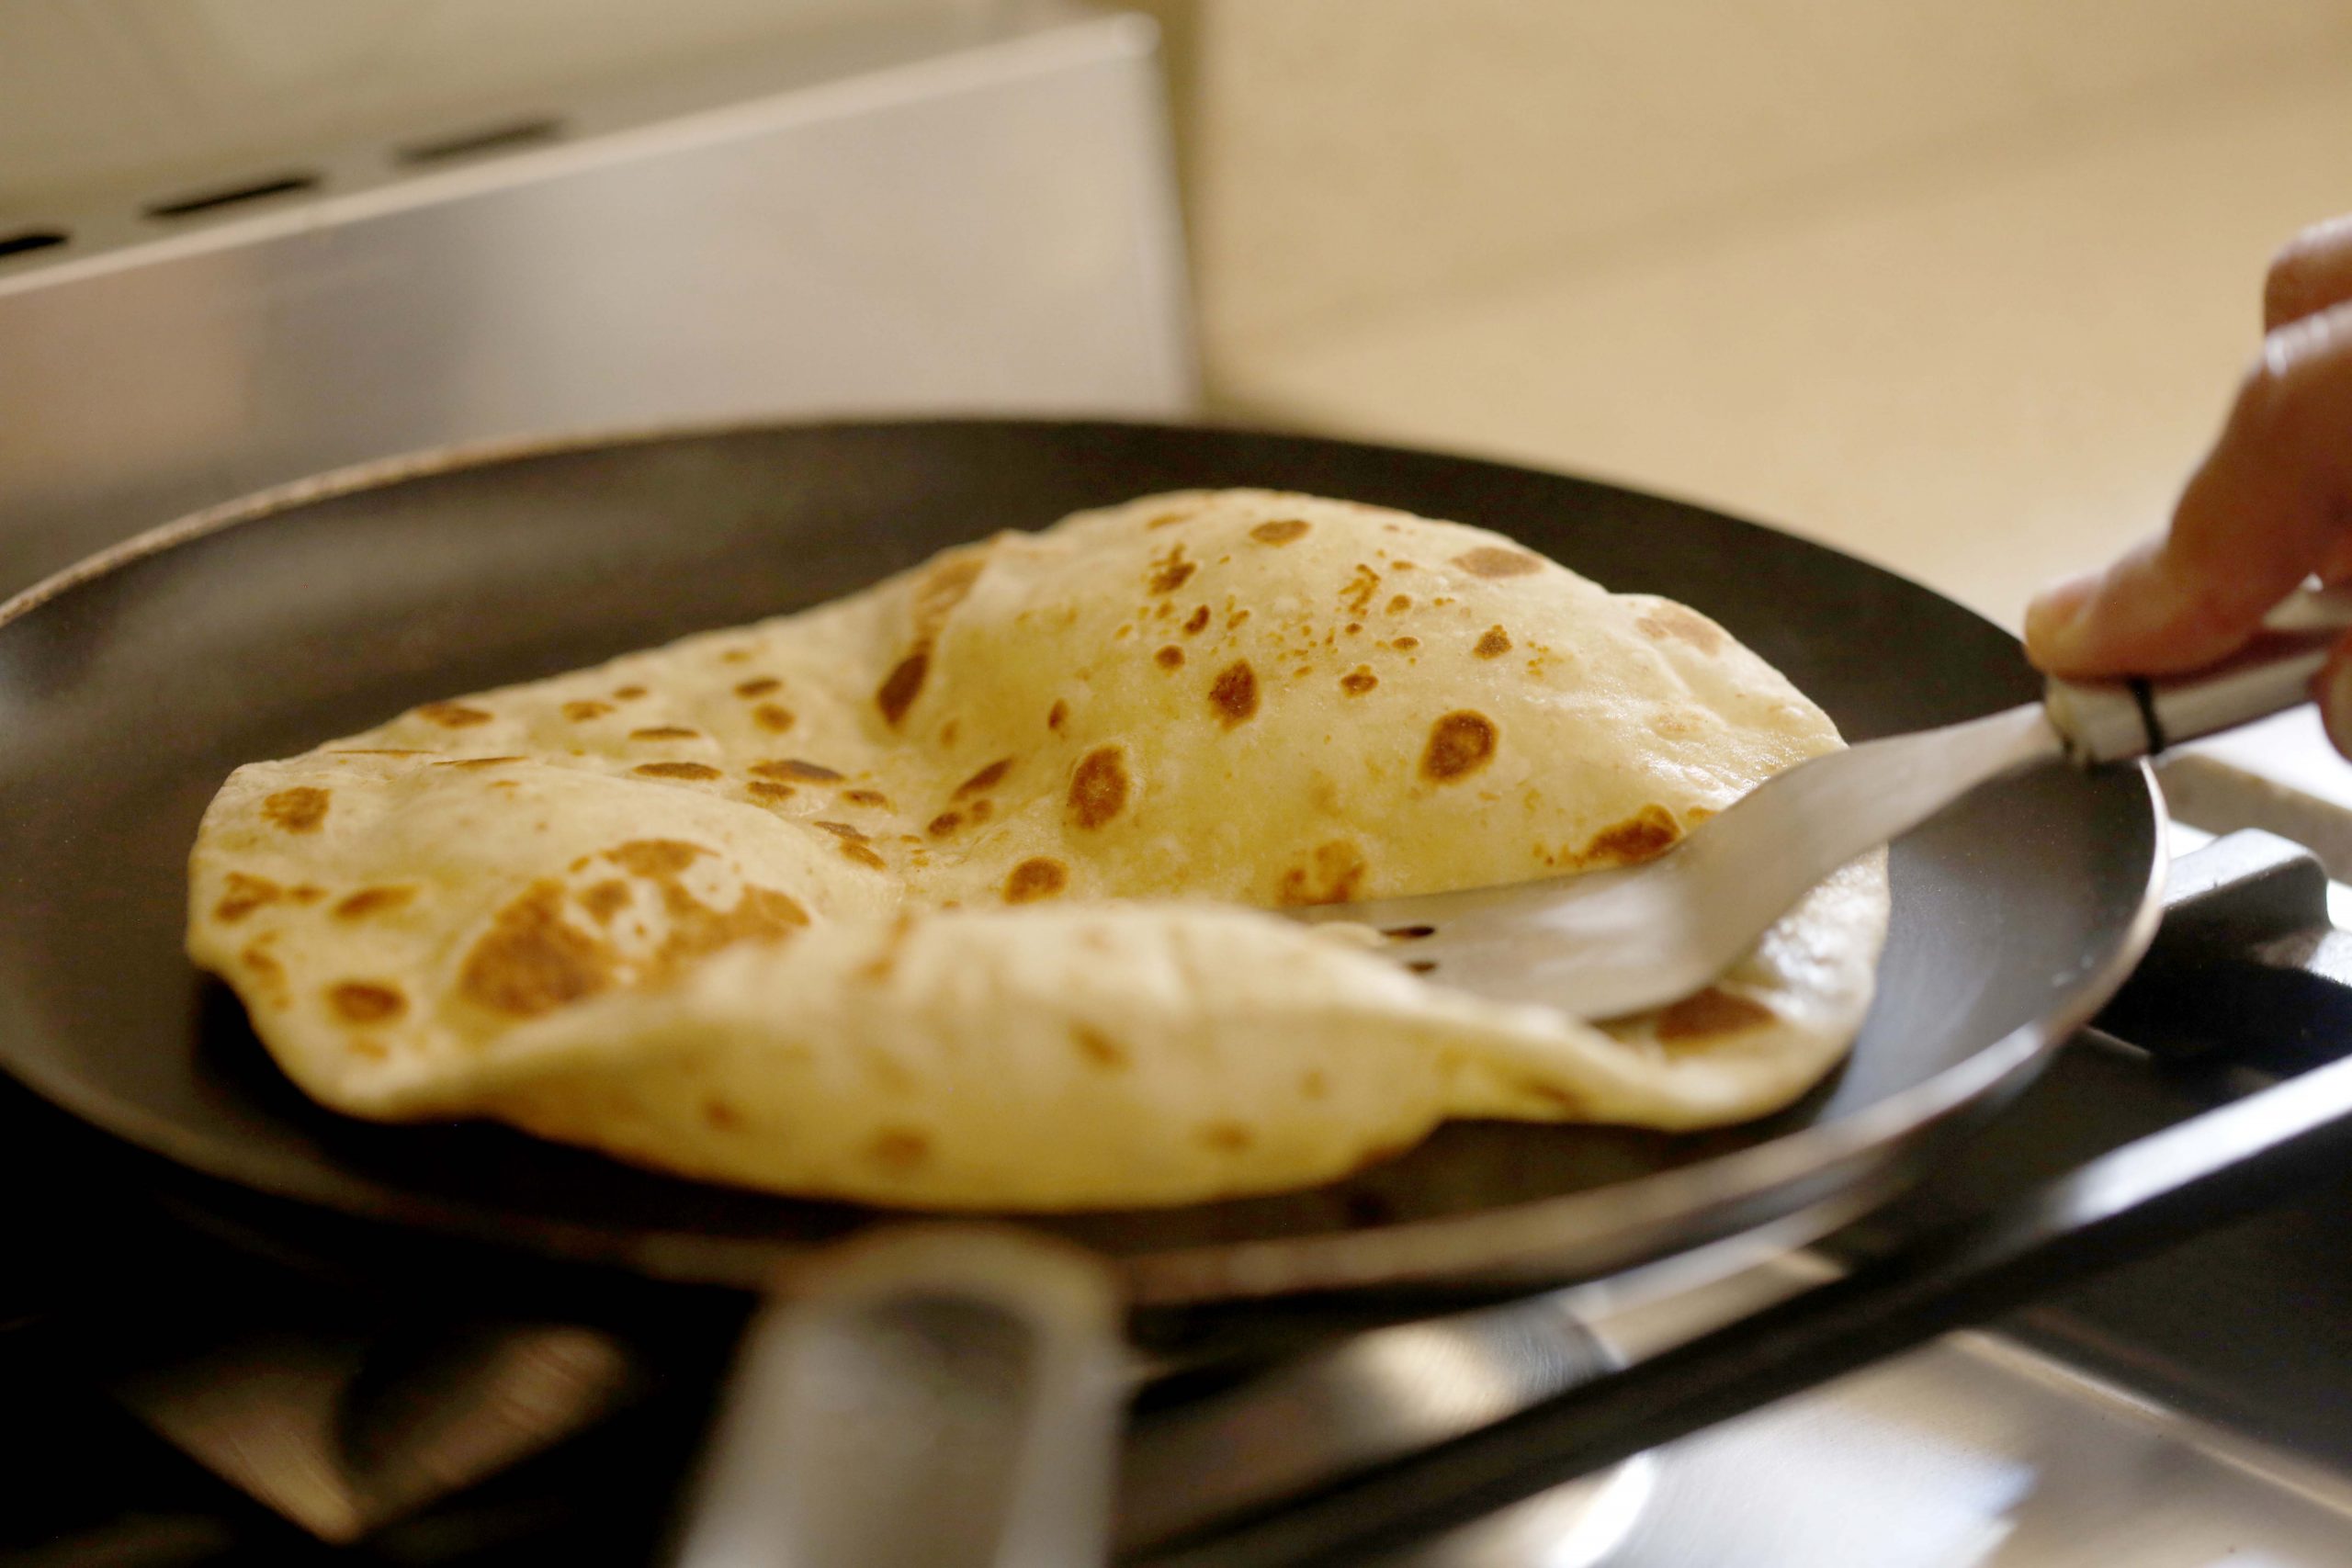
Fry your rotis in a non-stick pan – no need to add butter or oil. When they puff up, you’ll know you’ve done a top job.