

Here’s your go-to guide with that includes easy tips and tricks to create a winning submission. Let your picture do the talking – because remember, you eat with our eyes first!
Not sure where to start?
Begin by choosing the theme and month that you prefer from the list provided on the competition page. Think of recipes, seasonal produce and colours that fit that specific theme. Make a mood board (hello Pinterest!) of inspiring images that define the mood, look and feel that you are going for. Choose your favourite recipe out of the bunch and make it unique by creating your own version of it. Test your unique recipe at least once before you style and photograph it.
ALSO READ: How to write up a recipe and do a recipe costing
How to prepare food for a photo shoot
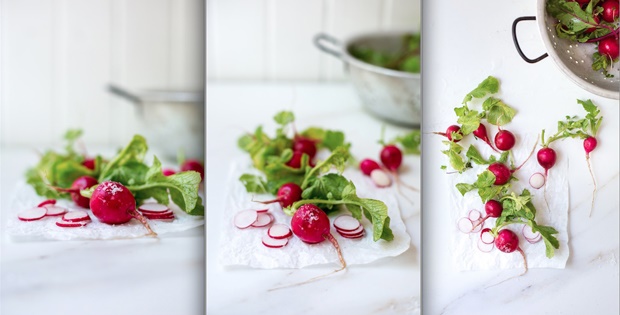
1. Always use the freshest and most blemish-free produce you can find. The more beautiful your produce is before you start cooking it the better it will photograph.
2. Place soft herbs and lettuce leaves in a bowl of iced water. This will refresh the leaves and keep them looking firm and vibrant throughout the day.
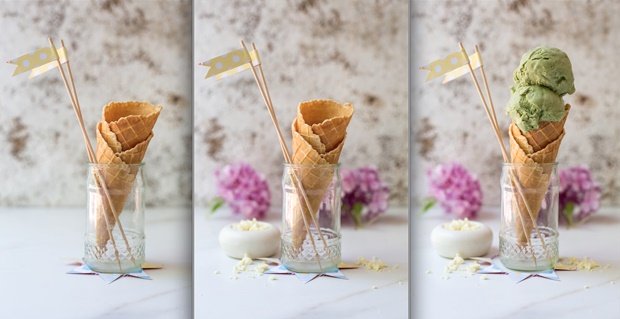
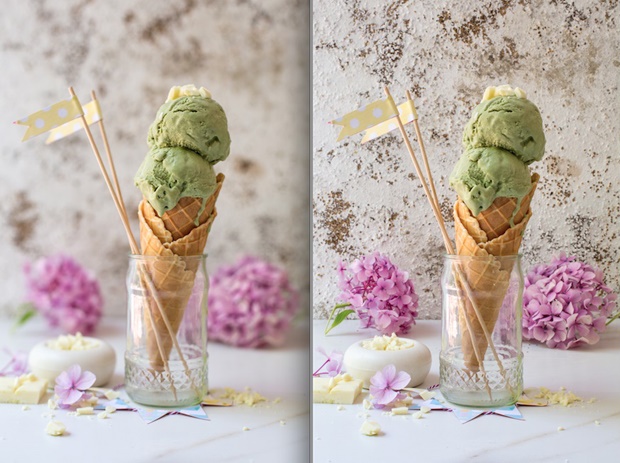
3. Cook your food on the day, and as close to shooting time as possible, to ensure that it looks fresh and vibrant. Some recipes like cakes and ice-creams can be made in advance.
4. Make sure all of your cooking prep is done before you start styling and photographing it. This will prevent your ice cream melting too quickly or dishes going cold before you have your final shot.
5. Do not over-cook meat or chicken as it will shrink and dry up making it less photogenic. The colour of medium rare steak generally looks more enticing on photographs than well-done meat.
6. Adjust your recipe while you are cooking it for the photograph and write down any tips that you encounter as you go. This will make it easier to compose your final recipe after the shoot.
Photographing food
1. Find a suitable table that is stable and works with your set up that is required.
2. Natural light is wonderful for food photography. Place your table for shooting, next to a large window or open door without any harsh sunlight. Soft, afternoon light is ideal but if you do encounter strong shadows due to harsh light then move your table further from the window or use a diffuser to block out extra harsh light.


3. A tripod is ideal as it secures your camera, ensures a sharper image and leaves your hands free to style your recipe.
4. Plan your composition of your shot by drawing it out by hand. You could also use an image as inspiration to help guide you.
5. Choose an angle that showcases your food the best. Side angles are ideal for drinks and ice cream cones while a ¾ angle works great when shooting salads, roasts or soups. A top angle is great for shots where it needs to look more graphic and works wonderful when shooting pasta and open sandwiches.

6. Experiment with composing your image. Placing your food off-center instead of in the middle often creates more interest and using uneven numbers when it comes to arranging elements in your shots is ideal.
7. If using a DSLR camera then experiment with depth of field. Often food looks more beautiful and interesting when it is in focus while the background has less focus.

Styling your food
1. Decide on an appropriate surface that compliments your food. It should not interfere with the colours of your food and crockery. Ideal colours for surfaces that work with most food would include natural colours like white, light grey and light pastel blue. Large matt tiles, old pieces of wood and fabric make great surfaces.
2. If your angle requires a background then choose a colour or texture that compliments your surface, food and theme. It could be a wall, a large piece of wood, some fabric or even your garden.
3. Get your photography set up ready with your camera and then style your shot in front of the camera. This way you can see exactly what is seen at the specific angle that you chose.

4. Use crockery and styling elements that tells the story that you are trying to convey with your recipe. This will enhance the mood of the shot and make it look more realistic.
5. For colour inspiration use a colour wheel to find colours that work together. Use that as a starting point for ideas on crockery, fabrics and surfaces.
6. Think outside the box. Use wooden crates or old doors as surfaces. Use interesting, vintage cutlery and crockery that are unique. Plate your dishes in unusual vessels that fit your theme like pumpkin soup in a hollow baked pumpkin.
7. Smaller portions are easier to style; they take up less space and look more refined. Avoid big, dark pots of food where food is not clearly visible.
8. Use a small spray bottle filled with water to spritz some water on your food once it is in front of the camera. This refreshes the food and adds a bit of moisture to prevent it from drying out. This works great with salads, raw or cooked vegetables and meats.
9. Meats and chicken can be brushed with a tiny amount of olive oil or its cooking gravy. This will make the meat look more appetising and add a bit of shine to it.
10. Less is more. Cluttered shots with many elements often distract from the main recipe.


Click HERE to submit your recipe.
SaveSave