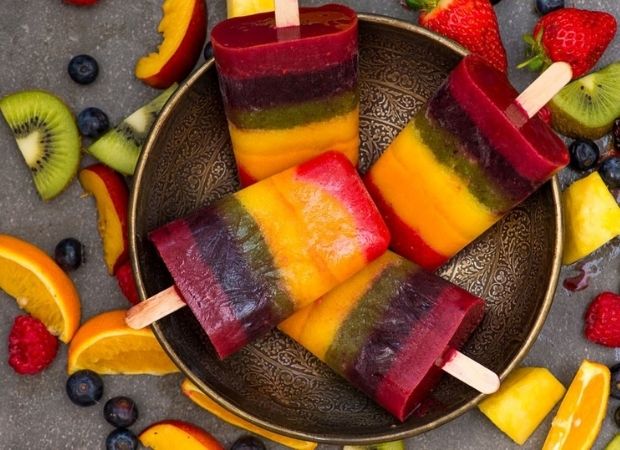
Rainbow fruit lollies

20 servings Prep: 2 hrs Chill/rest/proof: 2 hrs
Rate this recipe
Fresh fruit lollies - great snacks for 2021!

By Independent Contributor January 07 2021
7
SHARES
17.4k
VIEWS
Recipe Disclaimer
Tap for method
Tap for method

Ingredients (15)

Red Layer
3/4 cup strawberries — chopped and frozen
1/4 cup water
Orange Layer
1/3 cup dried apricots — frozen
1/3 cup nectarines — chopped and frozen
1/3 cup mango juice — or water for blending
Yellow layer
3/4 cup pineapple — chopped and frozen
1/4 cup orange pieces — or juice
Green Layer
3/4 cup kiwi fruit — peeled, chopped and frozen
1/4 cup water
baby spinach — only a few leaves for the colour, optional
Purple Layer
3/4 cup blueberries — frozen
1/4 cup water
Pink Layer
1/2 cup raspberries — frozen
1/4 cup blackberries — frozen
1/4 cup water
Tap for ingredients
Tap for ingredients

Method:

Blitz together the strawberries and water, then fill your ice lolly mould one sixth of the way up. You might wish to mark this out beforehand to keep the layers nice and equal. I find spooning the mixture as opposed to pouring works best here, and tapping the mounds on a hard surface helps to get the layers level.

Freeze until set, about 15 minutes (or about 45 minutes if your fruit wasn’t frozen to start with).

Blend the ingredients for the orange layer (I added a little honey here as the apricots were quite sour). Fill each mould with a layer of the mixture another sixth of the way up.

Repeat with the remaining layers, ensuring the previous layer is solid before adding the next to prevent the layers from mixing together,

After the last layer, freeze your ice lollies for at least 2 hours so that they are completely solid.

To remove the lollies from the mould, fill a bowl or sink with warm water and then place the mould in for a few seconds (but don’t let any water get into the moulds). If they don’t come out easily then leave them in the water a little longer.

TIP: If you are using the wooden ice cream sticks, push these in almost to the bottom after spooning in your orange layer. These are available at craft stores and baking stores. Otherwise use the tops that come with the mould after the last layer.

Reprinted with permission from The Sweet Rebellion, follow along on Instagram for more amazing recipes.


New recipes on Food24

Next Post

Leave a Reply

Your email address will not be published. Required fields are marked *

Food24 Team Loves

Newsletter

Get weekly access to our best recipes, tips and tricks

Sign Up

Login to your account below

Fill the forms below to register

Subscribe to Newsletter

Retrieve your password

Please enter your username or email address to reset your password.

Recipe Disclaimer

All recipe content is the responsibility of the party from whom such content originated. You agree that you use the content on Food24 at your own risk. Please read our editorial policy.